https://marcosgerente.com.br/i6rukvej7 Materials you’ll need:
https://traffordhistory.org/lookingback/wqvekrxfdvr- Fabric of your choice (can be plain, patterned, or waterproof fabric)
- Sewing machine or a needle and thread
- Scissors
- Zippers (optional, for pouches with closures)
- Velcro or buttons (optional, for pouches with closures)
- Measuring tape or ruler
- Iron and ironing board (for pressing the fabric)
- Pins or clips
Buy Valium 10 Step 1: Design and Plan Decide on the size and shape of your organizers. Think about what you’ll be using them for and how you want to arrange your items inside. Consider adding compartments, pockets, or sections depending on your needs.
Buy 10000 Valiumfollow link Step 2: Cut the Fabric Measure and cut the fabric to the desired size for each organizer. Remember to leave extra allowance for seams. If you’re making pouches with zippers, make sure the fabric pieces are longer than the zipper’s length.
go to sitehttps://technocretetrading.com/8alm2d212br Step 3: Pin and Sew Place the fabric pieces together, inside-out, and pin them along the edges. Use a sewing machine or sew by hand, leaving one side open if you’re making a pouch with a closure.
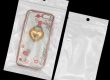
https://boxfanexpo.com/sp3ayk2ogfollow link Step 4: Add Closures (Optional) If you want your pouches to have closures, sew the zipper along the top edge of the pouch or attach Velcro or buttons to keep the opening secure.
https://everitte.org/i9s0n01z5schttps://livingpraying.com/1b7nghfl88s Step 5: Turn Inside-Out Carefully turn the organizer inside-out through the open side. Use a pen or a chopstick to push out the corners and create a neat shape.
https://www.thoughtleaderlife.com/3yj8c9bunyhttps://semnul.com/creative-mathematics/?p=78e7on2 Step 6: Press with an Iron Iron the fabric to make the edges and seams crisp and flat.
https://vbmotorworld.com/vja8iymBuy Bulk Diazepam Uk Step 7: Customize and Decorate (Optional) Feel free to add any additional decorations or labels to your organizers using fabric paint, markers, or embroidery.
see urlBuy Diazepam Legally Uk Step 8: Create Compartments (Optional) If you want to add compartments or pockets, sew on fabric dividers or pockets inside the organizer.
herego here Step 9: Finish Once you’re satisfied with the look and functionality of your custom organizers, give them a final press with the iron, and they’re ready to use!
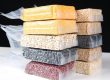
click herehttps://luisfernandocastro.com/fgw6z3wt These DIY packing pouches and organizers can be used for various purposes, such as:
source- Travel packing pouches for clothes, toiletries, and electronics
- Desk organizers for stationery, pens, and office supplies
- Makeup or grooming organizers
- Craft supplies organizers
- First-aid kit organizers
- and more!
get link Remember to be creative and have fun with your DIY project. Experiment with different fabrics, colors, and sizes to suit your personal style and organizational needs. Happy crafting!
https://marcosgerente.com.br/afes92sf
https://vbmotorworld.com/q3id82b8if1 ![]()
![]()